Bareknuckle Pickups at NAMM 2026: Scatter Winding, Alnico 3 and a First Play of an Unreleased Strat Set
Interview by Dan, Fret Success Guitar Show
Bareknuckle Pickups do not need a long introduction in the guitar world. Twenty-two years of building pickups in the southwest of England, everything made in house from raw materials, a roster of serious players who have stuck with them long term, and a reputation for doing things properly rather than cheaply. At NAMM 2026 I got a few minutes with Timmy from the Bareknuckle team to talk about where the company is heading and to play through something nobody had heard yet.
A Tone Chase That Became a Company
The Bareknuckle story starts with founder Tim Mills, a guitar player with a session career behind him who wanted to find something to replace active pickups. He was playing in an Ozzy Osbourne tribute band at the time and was after specific sounds that active pickups were not giving him. So he started experimenting.
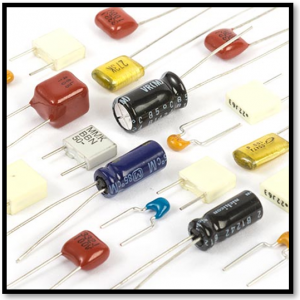
What followed was a gradual process of finding routes to the tones he was after, bringing in someone with more of an engineering background to make the ideas a reality, and slowly building out the operation into what it is today. Everything is still made in house, including the base plates, covers and all the physical components. Timmy was clear that this level of control is less about being able to tell a story to customers and more about what it actually delivers for quality. When you understand every nuance of every part, you stop accepting compromises in the final product.
Moving Back Towards Vintage and Low Output
One of the things I wanted to understand was where Bareknuckle are heading right now. The brand became well known through modern metal players, partly because that community picked up on the pickups early and spread the word. But Timmy was clear that the range has always covered everything from accurate vintage models to groundbreaking modern designs. What’s shifted in the last couple of years is an intentional move back towards the lower output, more dynamic end of things.
The concept they’re working around is what Timmy called clean drive. Not clean or drive, but both at once. Pickups with enough headroom to stay detailed and clear when played clean, but that hold together under gain rather than just getting louder and muddier. Getting there has involved a lot of work with different magnet types, particularly Alnico 3, a lower power magnet that produces a slightly fuzzy magnetic field. Full sounding without being muddy. Detailed and clear when you add gain.
The unreleased Strat set they brought to NAMM is the first expression of this thinking in single coil form. Three sets planned in the range, each using different magnet combinations. The set I played used Alnico 3 throughout, with a plain enamel wire approach across the whole set and a slightly oversize wire gauge on the bridge specifically to give the bridge pickup more body. Anyone who has spent time with Strats knows the bridge position is always the challenge. It tends to go thin and bright and hard to control. This approach is designed to address that at the source rather than compensating with amp or pedal settings.
Scatter Winding: The Counterintuitive Truth
The part of the conversation that I found most interesting and that I have been thinking about since was the scatter winding explanation.
Most people who know anything about vintage pickups know the term scatter winding and assume it means the randomness of the coil is what gives old pickups their character. The conventional story is that machine wound modern pickups are too consistent and too clinical, and scatter winding reintroduces that unpredictability.
Timmy turned that on its head. Scatter winding does not add character. It removes it. A very linear, consistent coil starts filtering certain frequencies and imprinting characteristics on the sound that you cannot design around and cannot get rid of. When you scatter wind and randomise the coil, you are removing those filtered frequencies and those imprinted characteristics. The result is a pickup that is more revealing and more accurate to what the player is actually putting in. The sound of the player comes through more clearly, not less.
That reframe shifts how you think about what a pickup is supposed to do. It is not supposed to add something to the signal. The best version of it gets out of the way.
The Blue Note P90
I asked Timmy what his personal favourites are from the Bareknuckle range. He mentioned the Polymath, which was the company’s first signature model done with Adam Getgood, and the Abraxas, which sits alongside it as a slightly lower output option for players who like that sound but want something more dynamic.
But the one he kept coming back to was the Blue Note P90. Vintage output, probably not right for everything he plays, but his favourite pickup in the whole range. I have recently put P90s in a guitar for the first time and that observation resonated. There is something about a well made P90 that just sounds like the guitar. Very honest. Very direct.
Playing the Unreleased Strat Set
The session ended with me playing through the pickups on the NAMM floor. The Strat set had no name and no confirmed release date at that point. What I can tell you is that it sounded exactly like what Timmy described. Articulate without being harsh. Full across the whole frequency range rather than just present in the top end. Balanced between positions in a way that makes you want to use all five rather than just the two or three that usually sound best.
It is the kind of pickup that makes you play differently almost immediately, which is exactly what Timmy said they are aiming for.
Watch the full conversation and the play through on the Fret Success Guitar Show: https://youtu.be/YCoa8gFvFSs.
If this kind of content is useful to you, sign up to the Fret Success mailing list at https://fretsuccess.com/ and I will send you new interviews, gear content and guitar insights direct to your inbox.
If you want more content like this delivered to your inbox, sign up to the Fret Success mailing list at https://fretsuccess.com/